Getting started with Skupper
To show Skupper in action, we need an application to work with. This
guide uses an HTTP Hello World application with a frontend service and
a backend service. The frontend uses the backend to process requests.
In this scenario, the frontend is deployed in the hello-world-west
namespace, and the backend is deployed in the hello-world-east
namespace.

While these instructions use this particular application for demonstration purposes, the steps are the same for any Skupper deployment.
Prerequisites
You must have access to at least two Kubernetes namespaces. In the
steps below, you can replace hello-world-west and hello-world-east
with your chosen namespaces.
Each namespace can reside on any cluster you choose. You can have one on your laptop and another on EKS or OpenShift. For convenience, you can have them all on one cluster.
Skupper works with any flavor of Kubernetes. Here are some of your options for setting up Kubernetes clusters:
- Minikube
- Amazon Elastic Kubernetes Service (EKS)
- Azure Kubernetes Service (AKS)
- Google Kubernetes Engine (GKE)
- IBM Kubernetes Service
- OpenShift
- More providers
These instructions require kubectl version 1.15 or later. See the
kubectl installation guide for more information.
Step 1: Configure access to multiple namespaces
Skupper is designed for use with multiple namespaces, typically on
different clusters. The skupper command uses your
kubeconfig and current context to select the namespace
where it operates.
Your kubeconfig is stored in a file in your home directory. The
skupper and kubectl commands use the KUBECONFIG environment
variable to locate it.
A single kubeconfig supports only one active context per user. Since you will be using two contexts at once in this exercise, you need to create two distinct kubeconfigs. You can then use the first kubeconfig in one console session, and the second kubeconfig in another.
Configure separate console sessions
Start a console session for each of your namespaces. Set the
KUBECONFIG environment variable to a different path in each session.
export KUBECONFIG=$HOME/.kube/config-hello-world-westexport KUBECONFIG=$HOME/.kube/config-hello-world-eastNote: On Windows, use the set command instead of export:
set KUBECONFIG=%UserProfile%\.kube\config-<namespace>Configure cluster access
The methods for logging in and accessing clusters vary by Kubernetes provider. Find the instructions for your chosen providers and use them to authenticate and establish access for each console session.
See the following links for more information:
- Minikube
- Amazon Elastic Kubernetes Service (EKS)
- Azure Kubernetes Service (AKS)
- Google Kubernetes Engine (GKE)
- IBM Kubernetes Service
- OpenShift
Set the current namespaces
Use kubectl create namespace to create the namespaces you wish to
use (or use existing namespaces). Use kubectl config set-context to
set the current namespace for each session.
kubectl create namespace hello-world-west
kubectl config set-context --current --namespace hello-world-westkubectl create namespace hello-world-east
kubectl config set-context --current --namespace hello-world-eastStep 2: Install Skupper on your clusters
To use Skupper on your Kubernetes, you need to deploy the Skupper controller and custom resource definitions (CRDs).
Use kubectl apply with the install
YAML to install Skupper on each
cluster:
kubectl apply -f https://skupper.io/install.yamlkubectl apply -f https://skupper.io/install.yamlFor other installation options, see Installing Skupper on Kubernetes.
Step 3: Install the Skupper CLI
This guide uses the Skupper command-line interface (CLI) to deploy a
Skupper network. You need to install the skupper command only once
for each development environment.
Use the install script to download and extract the command:
curl https://skupper.io/install.sh | shThe script installs the command under your home directory. It prompts you to add the command to your path if necessary.
For other installation options, see Installing the Skupper CLI.
Step 4: Create your sites
The skupper site create command sets up a Skupper site in the
current namespace.
Note: If you are using Minikube, you need to start minikube tunnel before you install
Skupper.
Create the site
Run the skupper site create command in the West namespace.
$ skupper site create west --enable-link-access
Waiting for status...
Site "west" is ready.Now run the skupper site create command in the East namespace.
$ skupper site create east
Waiting for status...
Site "east" is ready.Check the installation
To check the status of each namespace, use the skupper site status
command.
$ skupper site status
NAME STATUS MESSAGE
west Ready OK$ skupper site status
NAME STATUS MESSAGE
east Ready OKStep 5: Link your sites
After installation, you have the infrastructure you need, but your
sites are not linked. Creating a link requires use of two skupper
commands in conjunction, skupper token issue and skupper token redeem.
The skupper token issue command generates a secret token that
signifies permission to create a link. The token also carries the
link details. The skupper token redeem command then uses the link
token to create a link to the site that generated it.
Note: The link token is truly a secret. Anyone who has the token can link to your namespace. Make sure that only those you trust have access to it.
Issue a token
In West, use the skupper token issue command to generate a token.
skupper token issue $HOME/west.tokenUse the token to create a link
With the token in hand, you are ready to link the sites. Pass
the token from West to the skupper token redeem command in East.
skupper token redeem $HOME/west.tokenIf your console sessions are on different machines, you might need to
use sftp or a similar tool to transfer the token.
Check the link
Use the skupper link status command to see if the link is
established. You should see the following output:
$ skupper link status
NAME STATUS COST MESSAGE
hello-world-west-9b55e1b1 Ready 1 OKStep 6: Expose your services
You now have a Skupper network capable of multi-cluster communication,
but no services are attached to it. This step uses the skupper listener and skupper connector commands to make a Kubernetes
deployment on one namespace available on all the linked namespaces.
In this guide, we use the Hello World application to demonstrate service exposure. The same steps apply for your own application.
Deploy the frontend and backend services
Use kubectl create deployment to start the frontend in West.
kubectl create deployment frontend --image quay.io/skupper/hello-world-frontendLikewise, use kubectl create deployment to start the backend in
East.
kubectl create deployment backend --image quay.io/skupper/hello-world-backend --replicas 3Expose the backend service
At this point, we have the frontend and backend services running, but the frontend has no way to connect to the backend. The frontend and backend are in different namespaces (and perhaps different clusters), and the backend has no public ingress.
In West, use the skupper listener create command to create a listener for the backend. In East, use the skupper connector create command to create a matching connector.
Use the skupper connector create command in East to create a
connector for the target workload.
$ skupper connector create backend 8080
Waiting for create to complete...
Connector "backend" is configured.Use the skupper listener create command in West to create a matching
listener.
$ skupper listener create backend 8080
Waiting for create to complete...
Listener "backend" is configured.The commands shown above use the name argument, backend, to also set
the default routing key and workload. You can use the --routing-key
and --workload options to set specific values.
Check the backend service
Use kubectl get in West to make sure the backend service from East
is present. You should see output like this:
$ kubectl get service/backend
NAME TYPE CLUSTER-IP EXTERNAL-IP PORT(S) AGE
backend ClusterIP 10.96.175.18 <none> 8080/TCP 1m30sTest your application
To test our Hello World, we need external access to the frontend.
Use kubectl port-forward to make the frontend available at
localhost:8080.
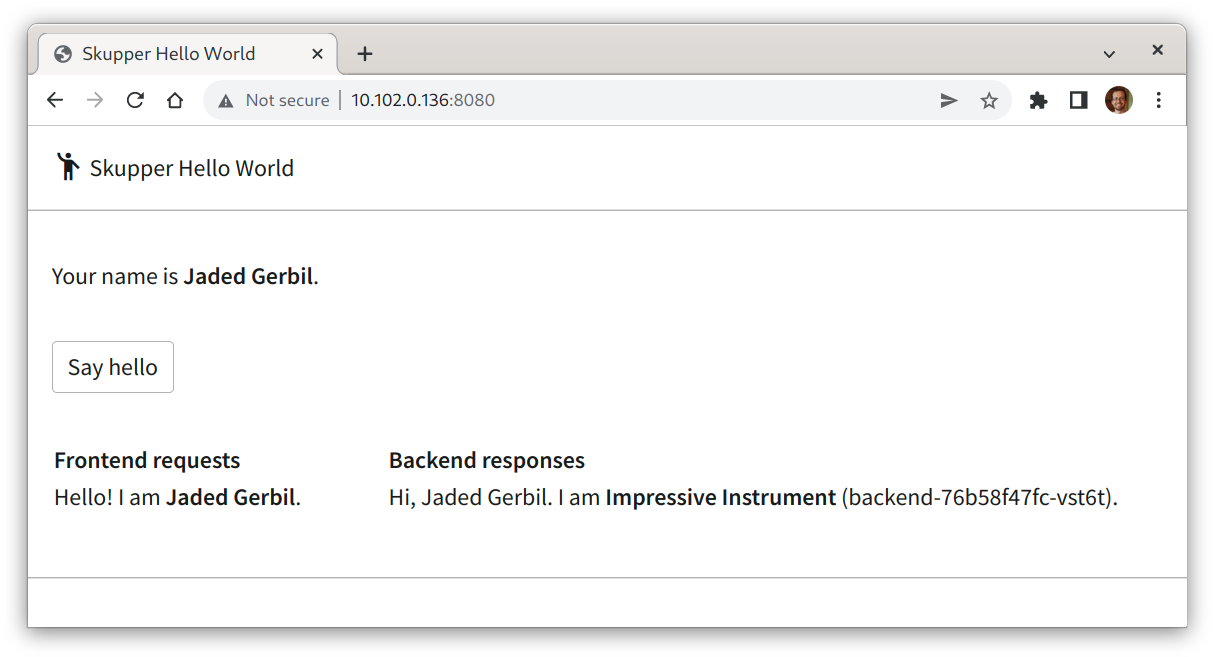
kubectl port-forward deployment/frontend 8080:8080If everything is in order, you can now access the web interface by navigating to this URL in your browser:
http://localhost:8080/The frontend assigns each new user a name. Click Say hello to send a greeting to the backend and get a greeting in response.
Summary
Our simple HTTP application has two services. We deployed each service to a different Kubernetes cluster.
Ordinarily, a multi-cluster deployment of this sort means that the services have no way to communicate unless they are exposed to the public internet.
By introducing Skupper into each namespace, we were able to create a virtual application network that connects the services across cluster boundaries.
See the Hello World example for more detail.
The steps in condensed form
curl https://skupper.io/install.sh | shexport KUBECONFIG=$HOME/.kube/config-hello-world-west
[Configure cluster access]
kubectl create namespace hello-world-west
kubectl config set-context --current --namespace hello-world-west
kubectl create deployment frontend --image quay.io/skupper/hello-world-frontend
kubectl apply -f https://skupper.io/install.yaml
skupper site create west --enable-link-access
skupper token issue ~/west.token
skupper listener create backend 8080export KUBECONFIG=$HOME/.kube/config-hello-world-east
[Configure cluster access]
kubectl create namespace hello-world-east
kubectl config set-context --current --namespace hello-world-east
kubectl create deployment backend --image quay.io/skupper/hello-world-backend --replicas 3
kubectl apply -f https://skupper.io/install.yaml
skupper site create east
skupper token redeem ~/west.token
skupper connector create backend 8080kubectl port-forward deployment/frontend 8080:8080
curl http://localhost:8080/api/health
[Navigate to http://localhost:8080/ in your browser]Cleaning up
To remove Skupper and the other resources from this exercise, use the following commands:
skupper site delete --all
kubectl delete deployment/frontendskupper site delete --all
kubectl delete deployment/backendNext steps
Now that you know how to connect services running on multiple clusters, here are a few more things to look at: